An important part of the design and development process is testing the materials you plan to use - this can, for example, ensure the materials are strong or durable enough for the task. Testing is also used as a method of quality control to ensure that products are safe and fit to be marketed.
There are two types of testing;
Destructive: where a material or product is destroyed during the testing process, through damage, breakage or wear and tear. This then gives the designer/manufacturer an idea of the tolerances of the product or material.
Non Destructive: these do not physically effect the product - these are usually carried out on the end product before it is sent to the user or as a Quality Control method during production.
Destructive Testing
Hardness Testing
What it tests: wear/abrasion resistance, resistance to deforming or indenting.
What it tests: wear/abrasion resistance, resistance to deforming or indenting.
|
|

|
|
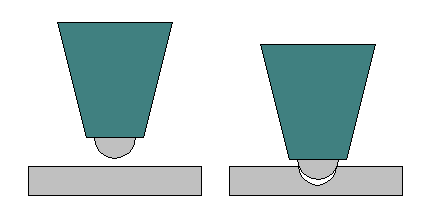
Brinell
A steel ball is pushed into surface of the material. The tester then records the depth and diameter of the indent - from this they then calculate the hardness number |
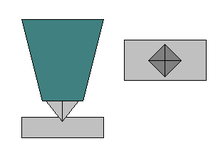
Vickers
A pyramid shape is forced into the surface of the material. Using a microscope the tester records the surface area of the indent and works out the hardness number. |
Rockwell
An indentation is made using steel ball or pyramid, the first indentation is with a minor load (yellow), then the same spot is indented again with a major load (blue). The hardness is then calculated digitally making it the quickest hardness testing. |
|
Fatigue Testing and Wear Testing
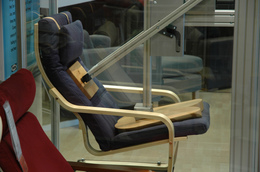
What it tests: wear and tear over time. The way this is tested depends massively on the end usage, for example if abrasion wear needs to be tested the material may be put in a situation where a disc of the same material is rubbed against it for a prolonged period of time. Like the chair testing in IKEA, where weight is repeatedly added and then removed to simulate a user sitting down and getting up repeatedly. |
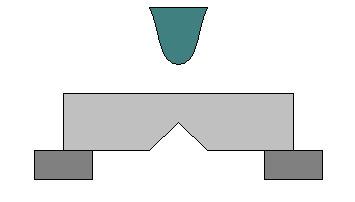
Impact Testing
What it tests: toughness and shock resistance.
A piece of material is loaded at this point a hammer swings down and strikes the material. The tester then measures the travel of the hammer and calculates what energy has been absorbed - this then gives an indication of how tough the material is.
Watch a short video here.
|
|
|
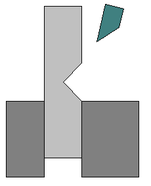
Izod Testing
The material has a v shaped notch cut out. With the Izod test the hammer strikes the top half at a 75 degree angle. |
Charpy Testing
The material has a V shaped notch also, this time the hammer strikes in the centre of the material. |
|
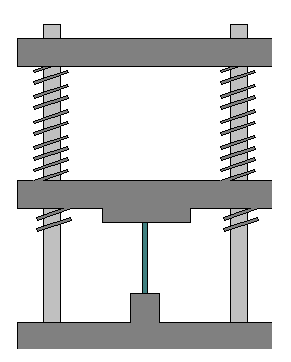
Tensile Testing
What it tests: tensile strength, ductility, elasticity and malleability. This is where a test piece of material is held between a clamp and moving jaw. This puts the material under tension and stretches the material until breaking point or beyond the machines capabilities. During this process the material will start "necking" (as shown on the image below) this is where the material thins in a particular area before snapping. There is a computer attached which calculates the distance travelled, this then generates a graph to show where the maximum load is. Watch a short video here. 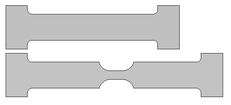
|
Non-Destructive Testing
Basic Quality Control Testing
Visual checks to find faults on the surface are used.
Liquid Penetration can also be used - this is where a liquid is applied onto the surface, the excess is then removed and chalk is applied to make the area more visible.
Visual checks to find faults on the surface are used.
Liquid Penetration can also be used - this is where a liquid is applied onto the surface, the excess is then removed and chalk is applied to make the area more visible.
|
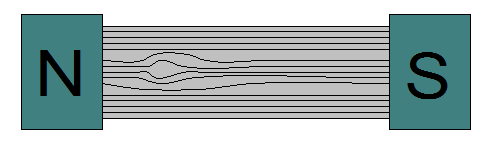
Metal Testing
Magnetic Testing: the material will be magnetised, iron particles are dusted over the material and where magnetic lines are broken it visibly shows where the defects or cracks are (see the area that has waved out in the image) - used to check weldings in order to make sure they are secure. Watch a short video here. Acid Pickling: used with steel casings, the weak acid solution will remove any oxides and when washed the cracks will be visible. |
|
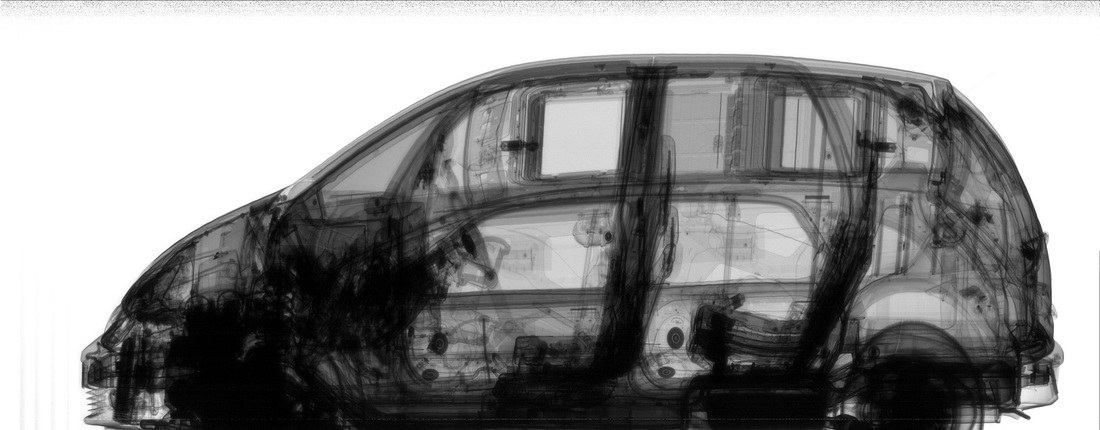
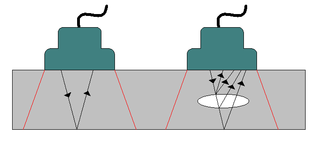
Internal Defects
Use of Light: in pottery bright light can highlight hairline cracks or faults inside the material. X-Rays: these can be used to find air bubbles in the fabrication of rubber for tyres, if bubbles are between the fabric and supporting wires it can cause the tyre to fail and this could have fatal consequences. The x-rays will travel faster through air pockets and different materials, this makes it easy to spot on the resulting image where areas of issue are. This usually shows up as a dark spot on an x-ray. Ultrasonic Testing: high frequency sound vibrations pass through the material and bounce back. In a solid material it will reflect back immediately, in materials with defects the sound vibrations may scatter or will take longer to bounce back - like the image to the left. |
